Ink
Ink


 Machines


 Studio supplies


 Power & batteries


 Aftercare


 Apprentice


 Piercing & jewellery


 PMU supplies


 New arrivals
 Sale
Sale
 Gift vouchers
 Shop all

Sterilising tattoo machines is a critical yet challenging task for tattoo artists, fraught with the risks of infection and cross-contamination. The machines' intricate parts and constant exposure to blood and bodily fluids make proper sterilisation essential but often overwhelming. Missteps can lead to serious health risks, complicating the artist's workflow and compliance with health regulations.
So, we will simplify the process, offering clear, step-by-step instructions to ensure thorough cleaning and sterilisation. This will help artists protect their clients and maintain a safe, hygienic environment.

Needed tattoo sanitation supplies for tattoo machines
Personal Protective Equipment (PPE)
Cleaning supplies
- Non-corrosive cleaning solutions
- Soft brushes for scrubbing parts
- Paper towels or disposable cloths
- Disinfectant wipes
- Spray bottles for cleaning solutions
Disinfection supplies
- Hospital-grade disinfectants (EPA-approved)
- Alcohol wipes or sprays (70% isopropyl alcohol)
- Ultrasonic cleaner with appropriate cleaning solutions
Sterilisation supplies
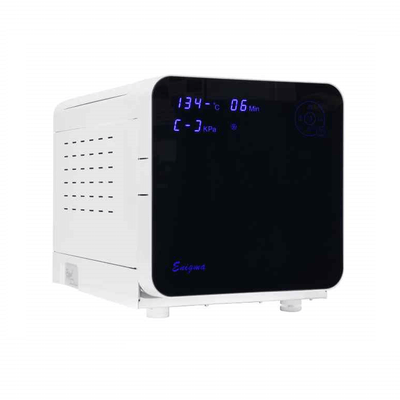
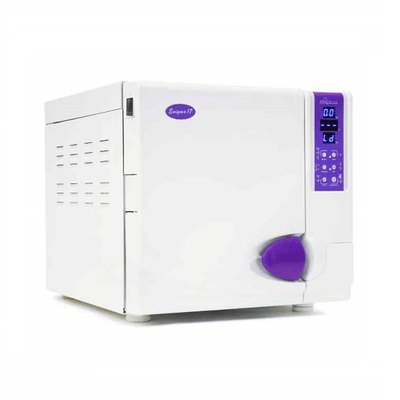
- Autoclave (steam steriliser)
- Autoclave sterilisation pouches
- Autoclave tape and indicators
- Cold sterilisation solutions (for parts that cannot be autoclaved)
- Ultrasonic cleaner (for cold sterilisation)
Machine covers
- Plastic bags, sleeves, or machine bags
- Clip cord covers
- Disposable grip covers
- Disposable tubes
Sharps disposal
- Sharps containers for disposal of needles and other sharp objects
Drying supplies
- Clean, disposable towels
- Air drying racks or stations

Step 1: Disassemble the tattoo machine
Start by removing all detachable parts from the tattoo machine, including the needle, tube, grip, and any other removable components. Proper disassembly ensures that each part can be thoroughly cleaned and sterilised.
Dispose of single-use items, such as needles, disposable grips, and other disposable parts, in a designated sharps container to prevent contamination or injury.
Step 2: Pre-cleaning
Rinse the disassembled parts under warm running water to remove any visible blood, ink, or debris. Submerge the parts in a non-corrosive cleaning solution to loosen any remaining contaminants.
Use a soft brush to scrub away any stubborn residue. This pre-cleaning step is crucial as it removes the bulk of contaminants, making the subsequent cleaning and sterilisation steps more effective.
Step 3: Ultrasonic cleaning
Fill the ultrasonic cleaner with an appropriate cleaning solution according to the manufacturer's instructions. Place the parts in the cleaner, ensuring they are fully submerged and not touching each other to allow optimal cleaning.
Run the ultrasonic cleaner for 10-15 minutes. This uses high-frequency sound waves to remove microscopic debris and contaminants that manual cleaning might miss.
Step 4: Rinse and dry
After ultrasonic cleaning, rinse the parts thoroughly under warm running water to remove any remaining chemical cleaning solution. Use a disposable towel or allow the parts to air dry completely.
Ensuring that the parts are completely dry is vital because any moisture can interfere with the sterilisation process, reducing its effectiveness.
Step 5: Sterilisation in autoclave
Place the dried parts in autoclave sterilisation pouches, making sure each pouch is sealed properly. Load the autoclave with the pouches arranged so that they do not overlap, allowing air to circulate freely.
Set the autoclave to the appropriate cycle, typically at 121°C (250°F) for 15-20 minutes, following the manufacturer's instructions. Monitor the cycle to ensure it completes without interruption. Autoclave indicators will confirm whether the items are properly sterilised.
Step 6: Storage and handling
Once the sterilisation process is complete, store the pouches in a clean, dry, and sterile environment until they are ready for use. Always handle sterilised equipment with clean gloves to prevent any chance of decontamination.
Step 7: Regular maintenance and record-keeping
Regularly maintain and check your autoclave to ensure it is functioning correctly. Keep detailed records of each sterilisation cycle, including the date, time, and items sterilised. This practice ensures compliance with health regulations and helps trace potential issues.

Additional tips
- Cold sterilisation: For parts that cannot withstand autoclave heat, use ultrasonic cleaners with chemical disinfectants for 8-24 hours. While not as effective as autoclaving, it reduces contamination risk.
- Cover your tattoo machine and grip/tube: Use plastic sleeves or machine bags during use and change them between clients or long sessions.
- Single-use needles and disposable items: Always use and properly dispose of single-use items in designated sharps containers.
- Follow manufacturer's guidelines: Adhere to instructions for tattoo machines and sterilisation equipment to maximise effectiveness.
- Clean and organised workspace: Disinfect surfaces regularly and keep tools properly stored to maintain hygiene.
- Health and safety regulations: Stay updated and comply with local regulations to maintain a safe working environment.
Final thoughts
Properly sterilising tattoo machines is vital for the safety of both artists and clients. By following the steps in this guide—cleaning, disinfecting, and sterilising—you can reduce the risk of infection and cross-contamination. Maintaining a hygienic tattoo station environment ensures compliance with health regulations and protects everyone involved. Prioritising sterilisation helps preserve the integrity of your work and ensures a safe tattooing experience.
Shop product