We've all seen it — that tattoo that was meant to be a masterpiece, but something went awry. Perhaps the lines aren't as crisp as they should be, or the design is slightly skewed. For many, the crux of these challenges lies in the first crucial step of the tattooing process: stencil application.
As a tattoo artist, understanding and mastering the art of using tattoo stencils is paramount to your craft. It can often be the difference between a tattoo that stands out for its precision and one that's remembered for its imperfections. With our ultimate guide, we aim to address the hurdles that both novice and seasoned tattoo artists face. From how to use tattoo transfer paper to how to apply a stencil, here's everything you need to ensure that every tattoo design begins with a flawless blueprint.
How long will a tattoo stencil last?
The longevity of a tattoo stencil on the skin largely depends on a number of factors, including the type of stencil paper used, the brand of stencil solution applied, and your client's skin type.
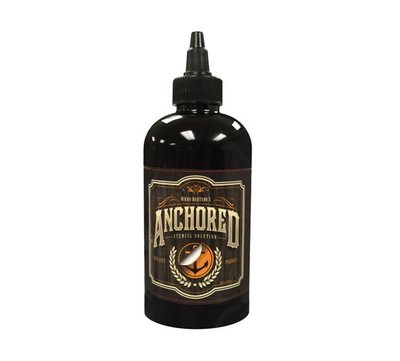
For an effective solution, consider using products like Anchored Stencil Solution which can greatly enhance stencil longevity and overall tattooing experience.
Generally, a well-applied stencil can last through the entire tattooing process. However, it's important to note that excessive wiping or client's sweat could potentially degrade the stencil, causing it to fade away sooner. Therefore, it's crucial for tattoo artists to strike a balance between maintaining the stencil's integrity and ensuring the comfort and hygiene of the procedure.

How to use tattoo transfer paper
Once you and your client have settled on the design, making a tattoo stencil is the next step in creating a professional-looking tattoo.
Thermal tattoo transfer paper
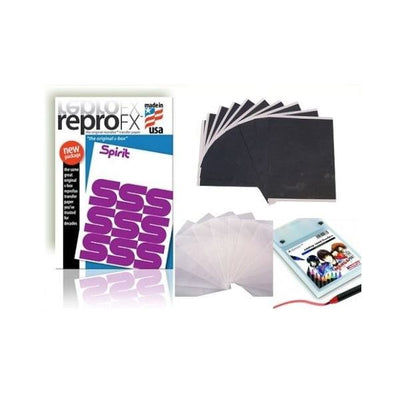
Thermal or thermographic transfer paper, such as Spirit Thermal Transfer Carbon Paper is a popular choice for making tattoo stencils. It typically consists of four layers: a top sheet, a protective thin layer that's discarded, a sheet of carbon paper, and finally, a bottom yellow layer that helps to keep the sheets in place.
When using this type of thermal transfer paper, use a normal printer to first print out your design. Next, use a thermal printer to transfer the design onto the thermal paper. To ensure a precise and clean transfer, make sure to line up your printed tattoo stencil with the thermal paper before you start the process. The design can then be cut out from the top sheet of tattoo transfer paper, ready to use.
Manual transfer paper
Artists can use products commonly referred to as hectograph, freehand transfer paper, or manual carbon stencil paper to manually create stencils. A4 Manual Impact Carbon Paper by Spirit is popular among many tattoo artists.
This method requires artists to trace their design onto the top sheet of the paper, completely by hand. Applying pressure with each line ensures enough carbon is transferred onto the sheet. The final stencil can then be cut out and applied to the skin.
How to apply a tattoo stencil
Once you've chosen the type of transfer paper, it's time to apply the stencil onto skin. Follow these steps to ensure a successful process:
Prep the skin
Shave the area to remove any hair, which may interfere with the stencil's clarity and also risk infection. Clean the skin with antibacterial soap and dry it with a clean paper towel or disposable cloth.

Apply stencil solution
Next, apply a stencil solution, such as Stencil Stuff to the area. This product helps the stencil adhere to the skin and transfer more cleanly. Allow for some drying time, the skin should feel tacky to the touch when it's ready.
Apply the tattoo stencil
Place the stencil (carbon side down) onto the desired area of skin. Press down evenly, ensuring all parts of the design contact the skin. Hold it in place for a few moments to allow the design to transfer completely. Carefully peel away the transfer paper to reveal the stencil on the skin.
Drawing tattoo stencils freehand
Although not as popular today for most tattoo shops, some tattoo artists opt to draw a design directly onto the skin. This option allows for greater freedom and creativity in the design process, provided that it's done with precision and accuracy. A surgical skin marker can also be used to make existing stencils more visible.
Creating tattoo stencils digitally
If you have a tattoo stencil printer, digital stencilling offers the precision of computer-aided design, eliminating the need to repetitively trace designs on physical paper. This ensures your lines are immaculate, with no room for imperfections like unintentional wobbles.

Save your image in a high-quality printable format before printing your design onto transfer paper. Be sure to use a suitable printer ink that is compatible with your device, such as Electrum ECO Stencils Printer Ink.
Why getting the tattoo stencil right is so important?
Getting the stencil right is paramount to your craft. Consider the stencil your roadmap; it guides your hand and ensures precision. If the stencil is off, not only does it risk the final outcome of the tattoo, but it can also affect your reputation as an artist. A well-placed, accurate stencil demonstrates professionalism and commitment to excellence.
A good tattoo stencil will also give clients a better understanding of the tattoo before it's complete. This ensures that both the artist and client are on the same page in terms of placement and design.
Ready to get stencilling?
Diving into the world of tattooing requires not only a steady hand but also a mastery over the foundational tools, and chief among these is the art of stencilling. Through a step-by-step guide, you've seen the what's required to craft a stencil like a professional. The stencil serves as your roadmap, a bridge between a client's vision and the tangible artwork on their skin.
As you prepare to take your tattooing skills to the next level, always remember the importance of the stencil in achieving that impeccable design. So, are you ready to get stencilling? With the right knowledge and practice, your path to professional tattooing is clear and marked for success.


 Studio supplies


 Power & batteries


 Aftercare


 Apprentice


 Piercing & jewellery


 PMU supplies


 New arrivals
 Gift vouchers
 Shop all


