The ultimate guide to applying temporary tattoos like a pro

Struggling with temporary tattoos that fade too quickly, don’t look right, or just won’t stick properly? It can be really disappointing when what seems like an easy task turns into a mess. Maybe you’ve dealt with tattoos that end up wrinkled, misaligned, or just washed away too soon, especially when you want them to look great for a special occasion or to try out a design before getting a real tattoo.
That’s why we’ve put together this guide to help you avoid the common frustrations and get that perfect, long-lasting temporary tattoo look you’re aiming for.

What are temporary tattoos?
Temporary or fake tattoos are non-permanent images that can be applied to the skin for a short time. They mimic the appearance of a real tattoo but can be easily removed. These tattoos are made from various materials, including paper coated with a type of ink or dye.
Moreover, temporary tattoos are popular for their ease of use, the ability to change designs frequently, and the lack of commitment required compared to permanent tattoos. They are often used for fun, fashion, or as a way to try out a tattoo design before making it permanent.
Different types of temporary tattoos
- Decal-style temporary tattoos: Applied with water and easily removable, these are the most common and resemble traditional tattoos.
- Henna tattoos: Made from a natural dye for a brownish stain, lasting up to a few weeks, commonly used in cultural ceremonies.
- Airbrush tattoos: Sprayed onto the skin through stencils with temporary ink, lasting several days.
- Glitter tattoos: Designs created with a body-safe adhesive and colourful glitter for a sparkling effect, lasting up to a week.
- Metallic or foil tattoos: Temporary tattoos with a metallic finish, offering a shiny, jewellery-like appearance.
- UV tattoos: Invisible under normal light but glow under UV light, perfect for parties or night events.
- Semi-permanent ink tattoos: Use a special ink that fades over time, lasting several weeks to a few months.
- Sticker tattoos: Adhesive designs that stick directly to the skin, easily removable, similar to a sticker.
Guidelines for applying temporary tattoos

1. Choose the placement
Pick a smooth, clean, and hair-free area of your skin. Avoid areas with lots of hair, as it can interfere with the adhesion and clarity of the tattoo.
2. Clean the skin
Wash the area with soap and water to remove any oils, lotions, or dirt. Dry the skin thoroughly. For better adhesion, you can lightly exfoliate the area to remove dead skin cells.
3. Cut out the tattoo
If your temporary tattoo is part of a larger sheet, carefully cut around the tattoo, leaving about a centimetre of margin around the design to handle it easily.
4. Peel off the protective layer
Most temporary tattoos have a clear protective sheet. Peel this off when you're ready to apply the tattoo.
5. Apply the tattoo
Place the tattoo face down on your skin in the desired location. Make sure it's straight and positioned correctly before you proceed.
6. Wet the paper backing
Soak a sponge or damp cloth with water and press it firmly against the paper backing of the tattoo. Make sure to wet the entire paper surface evenly. Hold or press down for about 20 to 30 seconds. Don't rush this step; the tattoo needs time to transfer.
7. Peel off the paper
Carefully peel off the paper backing. Do it slowly and gently to ensure the tattoo has transferred completely. If the tattoo hasn't fully transferred, you can re-wet the paper and press it down again for a few more seconds.
8. Dry and set
Once the paper is removed, gently dab the tattoo with a wet cloth or sponge to remove any excess adhesive and to help it set. Avoid rubbing. Let the tattoo dry completely for about 10 minutes without touching it.
How long do temporary tattoos last?
Temporary tattoos typically last anywhere from 3 to 7 days, depending on various factors such as the quality of the tattoo, the placement on the body, and how well they are cared for. Areas that experience more friction, like hands and feet, may cause the tattoos to fade more quickly.
To extend the life of your temporary tattoo, avoid rubbing the area, keep it dry, and apply lotion to moisturise the skin gently.
Techniques for removing temporary tattoos
Removing temporary tattoos is generally a straightforward process, but the method can vary slightly based on the type of tattoo and your skin sensitivity.
The most common technique involves using oil-based products. Baby oil, coconut oil, or olive oil are effective for loosening the adhesive of the tattoo from the skin. Simply apply the oil over the tattoo and gently rub it in for a minute or two. Then, using a soft cloth or cotton pad, you can usually wipe the tattoo away with ease.
For more stubborn tattoos, you might need to soak the area for a few minutes in the oil to fully break down the adhesive. Alternatively, rubbing alcohol or an alcohol-based sanitiser can also be used to remove temporary tattoos, especially if oil is not effective.
In some cases, a combination of warm water and mild soap, followed by gentle scrubbing with a washcloth, might be enough to remove the tattoo. Always moisturise the area afterwards, as some removal methods can dry out the skin.

Advice for maintaining temporary tattoos
- Minimise contact with water and avoid scrubbing the area where the tattoo is applied. When showering, try not to let the stream of water hit the tattoo directly for long periods.
- After getting the tattoo area wet, gently pat it dry with a towel instead of rubbing it. Rubbing can cause the edges of the tattoo to lift or become damaged.
- Apply a thin layer of a non-oily lotion to keep the skin hydrated. Moisturising can help the tattoo look fresher and last longer, but be sure not to use too much product.
- Besides a light, non-oily moisturiser, avoid applying lotions, oils, or sunscreens directly on the tattoo as they can dissolve the adhesives and cause the tattoo to fade or peel off.
- Wear loose-fitting clothing over the tattoo area to minimise rubbing and friction that can wear down the tattoo.
- Avoid excessive sweating and high temperatures. Heat and sweat can cause the tattoo to deteriorate faster.
- For some temporary tattoos, especially those that are high quality or applied with a transfer method, you can use a small brush and water-resistant makeup (like eyeliner) to touch up any parts that might have faded or peeled.
- If you’ll be in the sun, cover the tattoo with clothing or use a high SPF sunscreen around the area to prevent fading from UV exposure. Remember, sunscreens can affect the adhesive, so apply carefully around the tattoo.
Final thoughts
Whether you're aiming to test out a potential tattoo design, add a fun accessory to your look for a special occasion, or simply explore your style without commitment, this guide has you covered.
With expert tips and tricks at your disposal, you'll be equipped to enjoy professional-quality temporary tattoos that look stunning and last. This guide not only elevates your temporary tattoo experience but also empowers you to express yourself confidently, knowing that your temporary body art reflects the highest standards of quality and style.
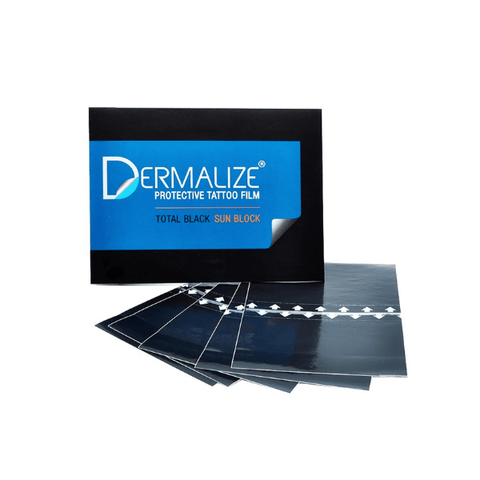
For those who are serious about maintaining the quality and longevity of their temporary tattoo designs while ensuring their skin is protected, the Dermalize Pro Total Black Sun Block - Protective Tattoo Film (Pack of 5) offers an advanced level of tattoo aftercare. This innovative product is designed to shield your tattoos from harmful UV rays, which can fade and distort the clarity of your temporary art over time.
- Tags: articles temporary tattoos
- Mark Joshua Luz