Ink
Ink


 Machines


 Studio supplies


 Power & batteries


 Aftercare


 Apprentice


 Piercing & jewellery


 PMU supplies


 New arrivals
 Sale
Sale
 Gift vouchers
 Shop all

Mastering colour realism tattoos is tough because it requires getting the colours and details just right. Many tattoo artists struggle with mixing colours perfectly and keeping these colours bright over time.
Also, it's hard to make the tattoos look as real and detailed as possible on different skin types. This guide offers simple techniques and tips to help tattoo artists improve at creating vivid, lifelike tattoos that last.
What are colour realism tattoos?
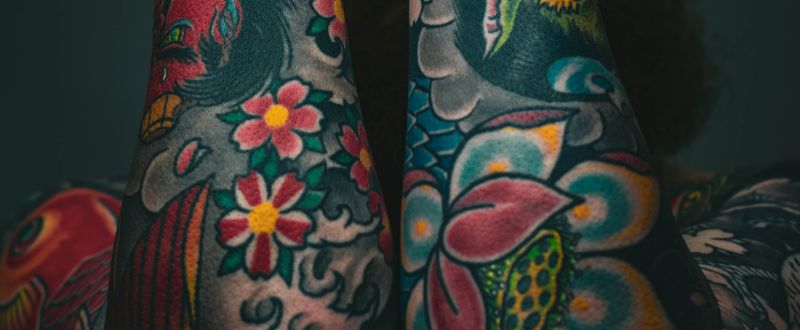
Colour realism tattoos are a style of tattooing that emphasises detailed, lifelike designs using a wide range of colours. This style mimics the appearance of real objects or scenes, such as animals, flowers, portraits, and landscapes, by skillfully blending shades and adding depth to create a three-dimensional look on the skin. Unlike traditional tattoos, colour realism typically avoids black outlines, focusing instead on realistic colour gradients and transitions to achieve its striking visual effect.
Characteristics of a colour realism tattoo
Colour realism tattoos are known for their distinctive characteristics that set them apart from other tattoo designs:
- Vivid colours: These tattoos utilise a full spectrum of colours to accurately replicate the natural hues of the subject matter, whether it's human skin tones, the vibrant colour of flowers, or the subtle shades in a landscape.
- Fine details: Artists pay close attention to detail to capture every element of the original subject. This can include textures, shadows, and highlights that enhance the tattoo's lifelike appearance.
- No outlines: Unlike traditional tattoos, which use black outlines to define shapes, colour realism tattoos often have no visible outlines. This helps create a more realistic and seamless image.
- Shading and depth: Effective shading is crucial in colour realism tattoos. It creates depth and dimension, making the tattoo appear three-dimensional on the skin.
- Photographic quality: These tattoos aim to mimic the look of a high-resolution photograph. Artists strive to recreate an exact likeness of their reference images, often making the tattoo look like it could be a real object or scene pasted onto the skin.
- Smooth colour transitions: The blending of colours in these tattoos is smooth and gradual, which helps achieve a natural look without harsh lines or abrupt colour changes.
- Large scale: Colour realism tattoos are often larger due to the level of detail involved. This allows the artist sufficient space to incorporate fine details and subtle colour gradations.
How to do a colour realism tattoo
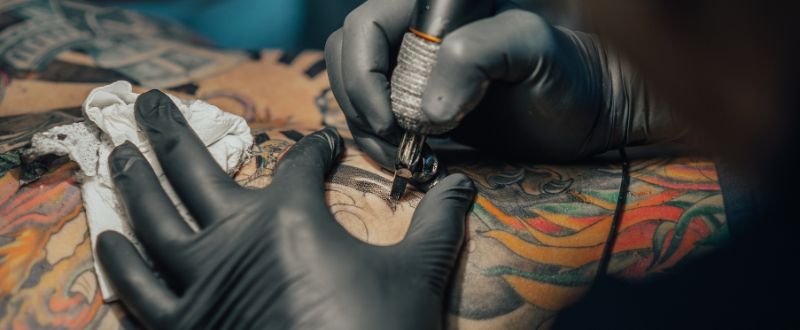
Creating a colour realism tattoo involves a meticulous process that demands both artistic skill and technical precision. You can follow this detailed guide that outlines the steps you, as the tattoo artist, should follow to achieve the best results:
Consultation and design conceptualisation
- Meet with your client to discuss their vision, ideas, and the desired placement of the colour realism tattoo.
- Discuss colour choices and how they may fade over time or react with the client's skin tone.
- Sketch preliminary designs, either by hand or using digital tools, and make adjustments based on client feedback.
Finalising the design and placement
- Once the design concept is approved, create the final design.
- Use a transfer paper to apply the design to the chosen area of the client's skin to finalise placement and scale.
Preparation of workspace and materials
- Ensure your workspace is clean and sterile. Prepare your inks, needles, and tattoo machine.
- Wear disposable gloves and have all necessary sterilisation and safety equipment at hand.
Skin preparation
- Clean the area of the skin where the colour realism tattoo will be applied using an antibacterial soap.
- Shave any hair from the area to ensure a smooth surface.
Outlining the colour realism tattoo
- Start with outlining the tattoo using a fine-liner needle. This step involves tracing the stencil lines you've transferred onto the skin.
- Outlining is crucial as it defines the boundaries and details of the image.
Shading and colour layering
- Begin shading to add depth and dimension to the colour realism tattoo. Use varying shades to create gradients and transitions.
- Start applying colour, typically beginning with lighter shades and moving to darker hues. Layer the colours to create realistic shadows and highlights.
Detailing and highlighting
- Focus on the details that make the colour tattoo appear more realistic. This includes adding texture and fine lines.
- Use highlights judiciously to make certain aspects of the design pop, enhancing the realism.
Continuous cleaning
- Throughout the tattooing process, regularly wipe the skin with a sterile cloth dampened with a diluted green soap solution to remove excess ink and blood.
Applying the final touches
- Once the colouring is complete, go over the design to ensure every detail is perfected and touch up any areas as necessary.
Techniques and tips for doing a colour realism tattoo
Creating a colour realism tattoo involves a combination of advanced tattoo techniques and meticulous attention to detail. These are some essential tips and techniques to consider:
- Familiarise yourself with the colour wheel, understanding complementary colours and how different shades interact on various skin tones.
- Use the right needles for different aspects of the tattoo. Round shaders are great for detail and fine lines, while magnums are better for filling and shading.
- Choose high-quality tattoo inks and learn how to mix them to achieve the precise shade required for lifelike realism. Colour matching to the reference image is crucial.
- Start with darker base layers and gradually build up to lighter shades and highlights. This creates depth and realism.
- Ensure even saturation of ink to avoid patchy areas. This may mean going over the same area multiple times with a light touch to build up colour density without causing trauma to the skin.
- Use detailed stencils to outline the design accurately on the skin, ensuring proportions and details are correct before beginning to tattoo.
- Master blending techniques to create smooth transitions between colours and tones, mimicking how light and shadow naturally interact.
- Pay close attention to small details that will add to the realism, such as reflections in the eyes or subtle colour changes in natural elements.
- Understand the light source in your design to properly add highlights and shadows and create the illusion of depth.
- Properly stretch the skin while tattooing to ensure the needles insert the ink at the correct depth uniformly across the design.
- Always maintain a sterile environment and use new, clean equipment for each tattoo to prevent infections.
- Engage with your client to understand their vision and expectations, and keep them informed about care instructions to ensure the tattoo heals properly.
- Colour realism requires patience and practice. Continuously refine your technique and take time to assess and improve upon each tattoo.
Do colour realism tattoos fade easily?
Colour realism tattoos can fade over time, just like any other tattoo, but they don't necessarily fade more easily than other styles. The rate at which a tattoo fades depends largely on factors like the ink quality, the tattoo's exposure to sunlight, and how well the tattoo is cared for after it's applied. Colour realism tattoos, which often use a broader spectrum of colours and detailed shading, might appear to lose their vibrancy if not properly maintained.
To minimise fading, following good aftercare practices is important, such as keeping the tattoo moisturised and protected from excessive sun exposure.
Subject ideas for best colour realism tattoos
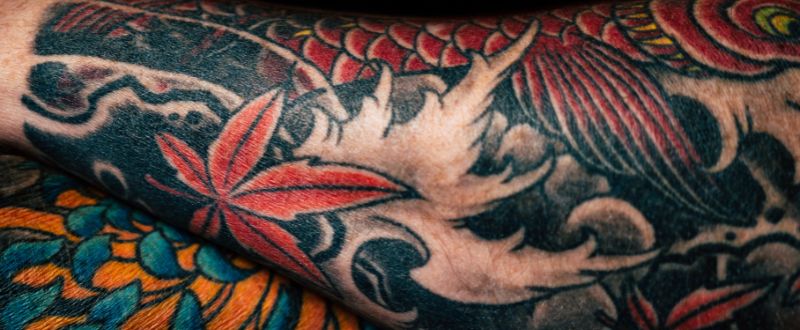
Colour realism tattoos are a beautiful way to capture lifelike images on the skin. Here are some ideas for themes and subjects that are well-suited for colour realism tattoos:
- Nature scenes: Lush landscapes, forests, oceans, and sunsets can be stunning when rendered in colour realism, bringing the tranquillity of nature to life.
- Animal portraits: Animal portraits are popular from the fierce beauty of lions and tigers to the delicate details of birds and butterflies. They can be very expressive and personal.
- Floral designs: Roses, lilies, orchids, and other flowers are perfect for colour realism, allowing for intricate details in petals and leaves with vivid colours.
- Portraits of people: Realistic portrait tattoos can memorialise family members, celebrities, or historical figures. They require a high skill level to capture human expressions and features accurately.
- Cultural and artistic works: Famous paintings or cultural icons can be transformed into tattoos. This could include scenes from a favourite movie or a well-known piece of art.
- Cosmic and celestial bodies: Images of space, such as planets, stars, and galaxies, offer a chance to use vibrant and varied colours in a dynamic composition.
- Underwater themes: The underwater world, with its diverse marine life and mystical landscapes, provides a rich palette for colour realism tattoos featuring sea creatures, coral reefs, and underwater scenes.
- Culinary creations: For food enthusiasts and tattoo lovers, high-quality images of fruits, desserts, or favourite dishes can make for unique and colourful tattoos.
- Mechanical objects: Vintage cars, motorcycles, or intricate machinery can be depicted with a high level of detail, showcasing the interplay of light and shadow on metallic surfaces.
- Sports and hobbies: Sporting equipment, scenes from important games, or symbols representing a person's hobby or passion can also be vividly depicted with colour realism.
Aftercare steps for a colour realism tattoo
To care for a colour realism tattoo, gently wash the area several times daily with lukewarm water and mild tattoo soap, and pat dry with a clean paper towel. Apply a thin layer of fragrance-free moisturising balm or a specialised tattoo aftercare ointment to keep it moisturised. Avoid exposing the colour realism tattoo to direct sunlight, soaking in water, and wearing tight clothing. It's important not to scratch or pick at the tattoo as it heals.
Continue to apply moisturiser even after healing, and consult your tattoo artist for any necessary touch-ups. If you notice signs of infection seek advice from a healthcare provider.
What is the difference between traditional and colour-realism tattoos?
The main difference between traditional and colour-realism tattoos lies in their style and appearance. Traditional tattoos, also known as American traditional, feature bold black outlines with a limited colour palette and often depict classic symbols like hearts, anchors, and eagles. They are known for their simplicity and iconic designs.
Colour-realism tattoos, on the other hand, aim to mimic the look of real-life images and scenes as closely as possible, using a wide range of colours and shading techniques to create depth and detail. These tattoos often look like photographs or detailed paintings on the skin, emphasising accuracy and lifelike representation.
Common problems with colour realism tattoos
Colour realism tattoos, which aim to meticulously replicate the hues and details of real-life images on the skin, must navigate several challenges, particularly when considering how different skin tones and normal colour vision affect the perception of colours. Here's a closer look at these issues:
- Colour matching and skin tone considerations: Achieving accurate colour matching is crucial, as the artist must select pigments that not only mirror the original image's colours but also adapt well to the client's skin tone. Since normal colour vision can vary subtly from person to person, what is vibrant and true to one individual might not look the same to another, reflecting the distinctive property of colour perception.
- Fading and colour longevity: Tattoos with colour realism often face issues with fading, which is a particularly salient property of brighter and lighter inks like yellows and oranges. This fading is influenced by factors such as sun exposure and the inherent qualities of the ink used.
- Blurring over time: The sharpness and clarity of a tattoo can degrade over time, affecting how physical objects are visually represented. This blurring can distort the original artwork, making it less representative of the intended realism and more abstract.
- Healing differences: The various especially salient properties of tattoo inks, such as their composition and colour density, can lead to different healing outcomes. This can result in unexpected shifts in colour after the tattoo has healed, presenting a challenge in maintaining the visual fidelity of the original design.
- Ink allergies and reactions: The distinctive properties of certain inks can sometimes trigger allergic reactions, which affect the health of the skin and can also alter the visual outcome of the tattoo.
- Technical skill required: Capturing the various especially salient properties of the original image, such as texture, shading, and depth, requires significant skill. This style of tattooing demands an artist capable of visually replicating complex objects with a high level of precision.
Final thoughts
So, hopefully this article provides essential techniques and tips to help you improve your skills in creating vibrant and lifelike tattoos. With practice and dedication, you can achieve stunning results that impress your clients and stand the test of time. By continuously learning and adapting, you can excel in the art of colour realism, turning each tattoo into a masterpiece of colour and detail.
Shop product