Ink
Ink


 Machines


 Studio supplies


 Power & batteries


 Aftercare


 Apprentice


 Piercing & jewellery


 PMU supplies


 New arrivals
 Sale
Sale
 Gift vouchers
 Shop all

Keeping your rotary pen tattoo machine clean is crucial to maintaining its performance, longevity, and ensuring the safety and satisfaction of your clients. Regular cleaning not only prevents the build-up of ink and debris but also helps prevent contamination and the risk of infections.
In this Magnum Tattoo Supplies how-to guide, we'll walk you through the step-by-step process of effectively cleaning a rotary pen tattoo machine. Whether you're a seasoned pro or an aspiring apprentice, these tips will help you maintain a hygienic and well-functioning tool—the hallmark of any good artist ;)

Gather your cleaning supplies
Before we dive into the cleaning process, make sure you have the necessary supplies on hand. We’ve put together a list that will set you up for success and ensure a spotless rotary pen machine.
- Disposable gloves
- Disinfectant spray or solution
- Disposable cleaning wipes
- Distilled water
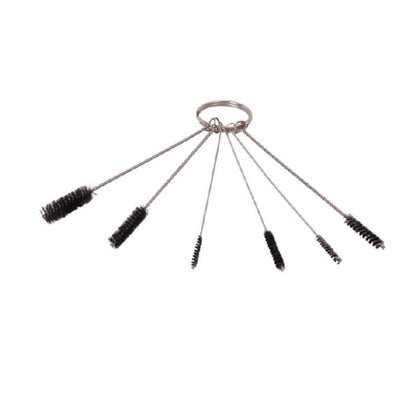
- Cleaning brushes (soft-bristle and small pipe cleaners). Check out our 5 piece cleaning brush kit — suitable for cleaning anything between a 1–3 needle tip and an 18 needle tip.
- Paper towels or lint-free cloth
- Plastic barrier film or disposable bag

Disassemble the rotary pen
Disassembling a rotary pen tattoo machine is straightforward and allows you to reach areas that a quick clean simply can’t. Safety first — make sure the machine is disconnected from the power source. Start by removing any cartridges or needles attached to the machine.
Next, locate the grip and needle drive system, which are typically attached to the machine’s body. Unscrew the grip carefully, keeping track of any small components. Once separated, the rotary pen is ready for cleaning, lubrication, or any necessary repairs. Handle all components with care and keep them in a clean, organised space to avoid losing parts. Place any disassembled parts in a sanitised bag until ready for reassembly.

Clean the grip & needle drive system
After disassembling the machine, focus on these crucial components that come into direct contact with the client’s skin. Rinse the grip under warm running water to remove visible residue. Then, apply a mild antibacterial soap or tattoo machine cleaner to clean the grip and needle drive system thoroughly.
Using a soft-bristle brush, gently scrub these parts to remove ink, blood, or any other debris. Finally, rinse the grip and needle drive system under warm water to eliminate any cleaning residue. This step is vital for both performance and client safety.
Clean the machine body
Cleaning the body of a rotary tattoo pen machine is essential for maintaining performance. Use a disposable cleaning wipe dampened with a tattoo machine cleaner or an alcohol-based solution such as Dettol.
Gently wipe the entire surface of the machine, paying attention to areas where ink and residue may build up. Use a small pipe cleaner to reach tight spaces, ensuring a thorough clean. Once done, dry the surface with a paper towel or lint-free cloth. This routine helps extend the life of your rotary tattoo pen machine and maintains excellent hygiene.
Reassemble the tattoo pen machine
Once everything is clean and dry, it’s time to reassemble your rotary pen. Securely attach the grip and needle drive system back to the machine body. Clean the power cord and other external surfaces with a disinfectant wipe to ensure complete cleanliness.
To protect against contaminants, place the entire machine in a plastic barrier film or disposable bag until its next use. This keeps your rotary tattoo pen sterile and ready for the next session — so you can focus on creating incredible art!
Conclusion
And there you have it — your complete guide to cleaning your rotary pen tattoo machine. If you’re looking to get your own, explore our wide range of rotary machines, including the Bishop Rotary sets and the Axys Valhalla.
We truly appreciate your continued support of our blogs! Whether you're a tattoo artist, apprentice, or simply curious about tattooing, we love providing valuable insights for you. Subscribe to our newsletter to get the latest guides straight to your inbox.
Shop product